Compressing your audio to Mp3 for an AVI file
Some of you may recall that in the old version of this guide we used
the Lame ACM codec to compress the audio. While this is still a
perfectly valid (and compatible) way of compressing the audio it does
unfortunately lack some of the tweak that have been made to the Lame
codec in the last few years, particularly in the alt presets. The old
method will be described but a new and preferred method will also be
detailed.
About mp3 in the Avi container
Due to the design of the mp3 container in can only technically support constant
bitrate mp3 audio. Variable bitrate
mp3 audio is supported using a hack - this quote from the AVI-mux GUI
website gives the details:
"Seeking in an MP3-VBR audio stream in DirectShow
works as if it were a video stream,
not an audio stream: Each chunk contains data for a constant amount of
time (usually 33 or 40 ms for video,
or 24 ms for MP3-VBR audio). The chunk=frame to be loaded is just
[time] / [time per frame].
Although the way MP3-VBR is seeked in is valid for AVI files, it is not
at all intended to be
used for audio streams!"
Many people use vbr audio in their encodes and it does playback ok
although there are reports of sync issues in some circumstances. It
should be further noted that when attaching a vbr mp3 file to an avi
that there is almost 3 times as much overhead required to do so than
with a cbr audio stream.
cbr is, in many ways, just neater and it is still the preferred method
of mp3 compression in this guide (although vbr will be easy to set as
you will see later).
Using BeSweet to compress your audio (recommended)
Using LameACM to compress your audio
Using BeSweet to Compress Your Audio
When the last guide was written there was a problem with mp3 files
generated from BeSweet not having headers to identify them as CBR which
lead to files being muxed incorrectly to the avi. These have been
solved now so besweet generated mp3 files are perfectly fine to use.
BeSweet is a complex program that comes with the AMVapp but, if you
install the AMVapp, this complexity is reduced thanks to a number of
Presets that I have written for you to choose from.
To open BeSweet go to AMVapp > Audio Apps > BeSweet GUI in your
Start Menu. When you select this a small window asking if you want to
start with the Wizard or BeSweet GUI will appear. Choose
BeSweet GUI.
Now, in the top left corner you will see some boxes that say Input
and Output and both of these have folder icons next
to them. The Input box is, unsurprisingly, where you need to
locate your source audio - so click on the folder icon.
You will notice that when searching your directories that it only shows
files of the extension you have chosen, so please choose
.wav as the extension when loading a .wav file.
When you have selected the location, click OK and return to the main
screen. Once you are back to the main screen, have a look at the Profiles
and if you are using the amvapp version you will see a bunch by me. If
you do not have the amvapp version, you can download my besweet
profiles from here.
As I have mentioned earlier, CBR encodes are the most
compatible, so it is advised that you choose one of the CBR profiles -
there are 5 bitrates to choose from (128 to 320). A bitrate of 160 or
192 will be fine and 224 will be very close to CD quality.
You can, if you really insist, choose a variable bitrate option. There
are a few to choose from - if you want small audio streams there are
both 128 kbps ABR (average bitrate) and 160 ABR options. If you want a
higher vbr then VBR_Standard averages at 192 kbps and is very good
quality and Extreme averages at 250 kbps and is excellent quality
(these are simply the --alt-presets if you are familiar with Lame
encoding).
The highest quality you can get with Lame MP3 is the 320 CBR option.
Once you choose the preset you want, you will want to choose an output
location and filename using the Output folder (although BeSweet
will choose one by default). Once you are happy with these settings
click WAV to MP3 and wait for your mp3 file to encode - it should only
take a minute or two.
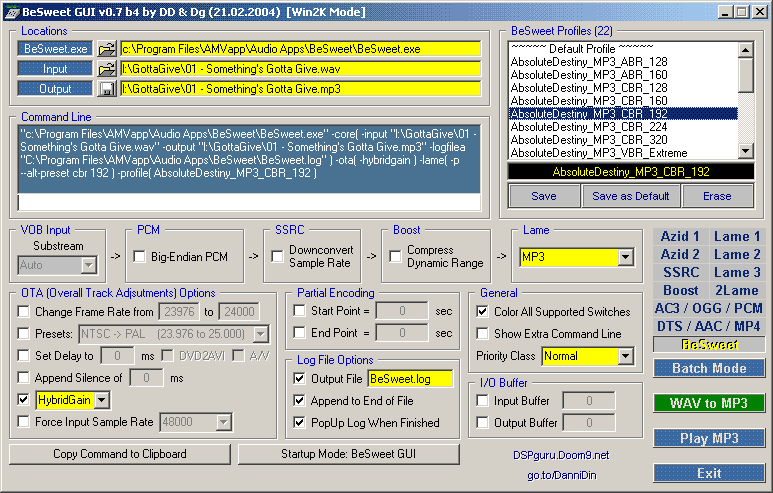
Note: it is always worth choosing the Log File Options (as shown in the
image above) in case something goes wrong.
Attaching (Muxing) the MP3 to your Compressed Avi File
Once you have your mp3 ready to go, you need to attach it to
your video. You can do this during or after encoding the video, it
doesn't matter which, but the way this guide is ordered presumes you
have encoded the video already.
Open VirtualDubMod and File > Open the avi file you
want to process. If you have encoded already, this is your compressed
version. With a compressed file you do not want to compress the video
again so choose Video > Direct Stream Copy.
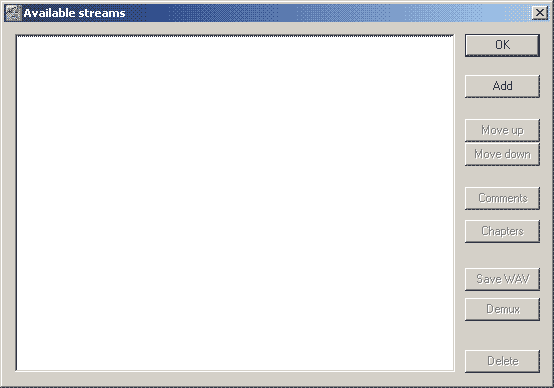
Now go to the Streams menu and choose Stream List. You
should get something that looks like this:
This is where you can add audio streams.
It is possible that there may be a stream present here already (a WAV
audio or similar) if there is a stream there that you do not want,
select the stream and choose Disable or Delete.
This should cross out or remove that stream ready for you to add your
mp3 as the primary audio stream.
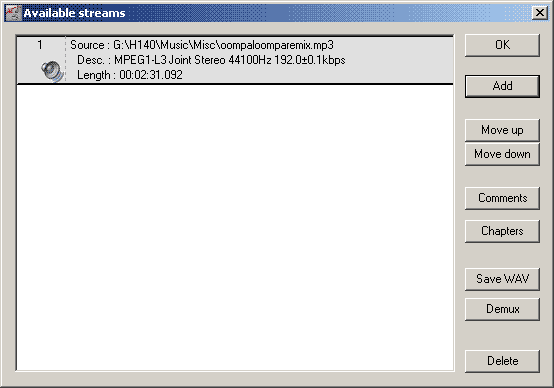
To add the mp3 click Add and choose the file that you encoded
with BeSweet.
When this is added the stream list will look something like this:
Once you have your audio stream loaded, click OK and return to vdubmod.
You can now choose File > Save As and export your final
compressed avi file with mp3 audio.
And that, folks, is a rap.
Using LameACM to Compress your
Audio in VirtualDubMod:
This method is very simple and involves importing
your wav audio to virtualdubmod and selecting Lame MP3 compression
settings. (You may need to download the AMVapp
for the LAME ACM MP3 codec)
For this conversion you will need to have the wav
separate from your video which, if you don't have already, you can do
with this guide or you can
export your audio separately
in your video editing program. This is merely to make sure that
everyone is doing the same thing :)
Setup Options
You should ideally add your audio either during
the 2nd pass of your DivX/XviD encode or by muxing it after. To mux the
audio after you have encoded the video, load your encoded video into
Virtualdubmod and in the Video menu choose "direct stream copy".
To compress your audio in Virtualdubmod, go to
the Streams menu. Choose "Stream List" and you will
see a window like this:
This is an avi file that has a WAV audio stream
already. If your window has no streams you can add your wav audio by
clicking the Add button (which is obscured in this image).
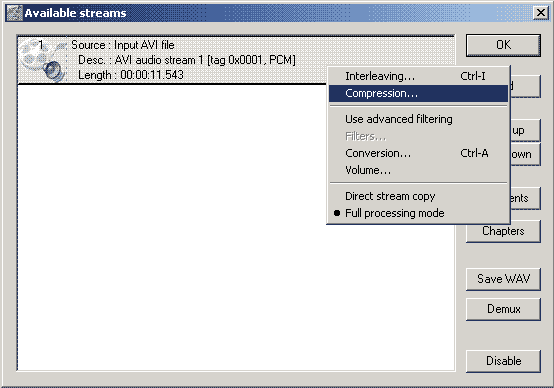
Then once you have your audio stream, you can right click the stream,
choose Full processing mode and then right click again to
choose Compression...
A new window will appear with a list of possible
audio compressors, you will want to choose Lame MP3. DO NOT
choose the entry called MPEG Layer-3 as that is inferior to the Lame
compressor.
Once selected, in the box on the right, a long
list of settings will appear. The first thing you should ask yourself
is what is the "sample frequency of my audio and is it in stereo?". CDs
are always 44.1KHz, dvds are 48KHz. There is a problem that lots of
people seem to have in Virtualdub with "Audio Compression not possible"
errors. So please read this carefully:
Virtualdub cannot encode something at 44.1kHz
Stereo if the source is 48kHz or mono etc. The reason you are getting
the error is because you are encoding the stream without converting the
input to match the selected compression type. So, make sure that you
select the right options for your input audio - if you have a 48kHz
stream then choose that as the encoding option.
It is possible to convert the audio in
Virtualdubmod by selecting the Conversion... menu but I personally
wouldn't recommend it. The only time I could see conversion to be
worthwhile is if you have a 48kHz input stream and want to make sure
people with old soundcards can play it but to be honest, if they can't
play 48kHz audio then they probably can't play divxes. Converting
upwards is a pointless waste, so don't do it.
In the Lame compression box you will see a list
like this:
44100 Hz, 320 kbps CBR, Stereo 40KB/s
44100 Hz, 256 kbps CBR, Stereo 32KB/s
44100 Hz, 224 kbps CBR, Stereo 28KB/s
44100 Hz, 192 kbps CBR, Stereo 24KB/s
44100 Hz, 160 kbps ABR, Stereo 20KB/s
44100 Hz, 160 kbps CBR, Stereo 20KB/s
...
44100 Hz, 128 kbps CBR, Stereo 16KB/s
44100 Hz, 124 kbps ABR, Stereo 16KB/s
These mean as follows: 44.1KHz audio at 320kbits
per second, Constant BitRate, Stereo. The eagle-eyed amongst you will
notice that there are ABR (Average BitRate) options.
In the previous guide ABR was recommended but it
has come to my attention that files encoded with ABR are not as stable
as I once thought. So, I recommend choosing a CBR option. As for the
bitrate 160kbps is fine but anything 128 or higher will be "ok". If you
can do 192 or higher then that would be even better but it depends on
how much space you want to spend on your audio encode. Something close
to CD quality would be 224 kbps or above.
You will notice in the stream menu when you right
click that there is a setting called Interleaving. This
is worth talking about briefly as it designates how your audio will be
'joined' to the video. Audio is separated and processed in frames just
like video and for playback it is best if they are interleaved. Check
out the interleaving option but the default setting of 1 frame is fine
for this. You can use this option to set an offset to your audio in the
rare case that this would be required. See the help file for details on
this.
When you've set everything up, return to the main
vdubmod window, go to the File menu and choose "Save as Avi"
and you're done.
Note: If when trying to compress
your audio in Virtualdubmod you notice that the Audio Stream stops at a
few kb, then you will need to go into Options > Preferences... then
choose the AVI tab and select Do Not Correct MPEG Layer III Audio
Streams. If this is not selected then the Lame encoder and
Virtualdubmod sometimes fight it out and you don't get any audio.
Selecting this will fix it.
AbsoluteDestiny - September 2004
|