
Subtitle & Logo Removal Guide
by Zarxrax and Machine
First off, I know that most of the people reading this guide are going to use it for ill. Fess up, you just downloaded some fansubs and wanna make an amv out of it, right? Well I'll start off by giving you a few reasons why you should NOT do that:
1. Cropping in VirtualDub - The easy way for you lazy guys.
This makes your video look horrible, but it is at least better than leaving the subtitles in. You will need the program VirtualDubMod, which is included in the AMVApp. Simply create your music video in whatever program you use, and then export it as either an uncompressed or huffyuv AVI file (This should be covered in the Guide To All Things Video). Now start up VirtualDdub, go to the file menu, and select open video file, and open the AVI of your music video.
Now go to the video menu, and select filters. Click the Add button. Choose Null Transform from the list that appears. Now you should be back at the Filters window, and the null transform filter should be listed inside the box. Now click on the Cropping button. In the new window that appears, you can use the little slider to move around in your video. You want to adjust the Y2 offset until it covers up all the subtitles. If there are subtitles on the top of the screen too, then you will need to adjust the Y1 offset as well.
Now you can simply save the new AVI file as explained in the Guide To All Things Video.
2. Selective Cropping
Note - This method is explained using Adobe Premiere. It is possible to achieve this same effect using other programs, but you will have to read the manual for whatever program you are using and figure out how to do it yourself. What we are doing here is simply applying a cropping filter to each individual clip that needs to be cropped. This method has a downside - Adobe Premiere uses a really bad resizing algorithm, so the clips that you do this too will look blurrier than the rest of your video.
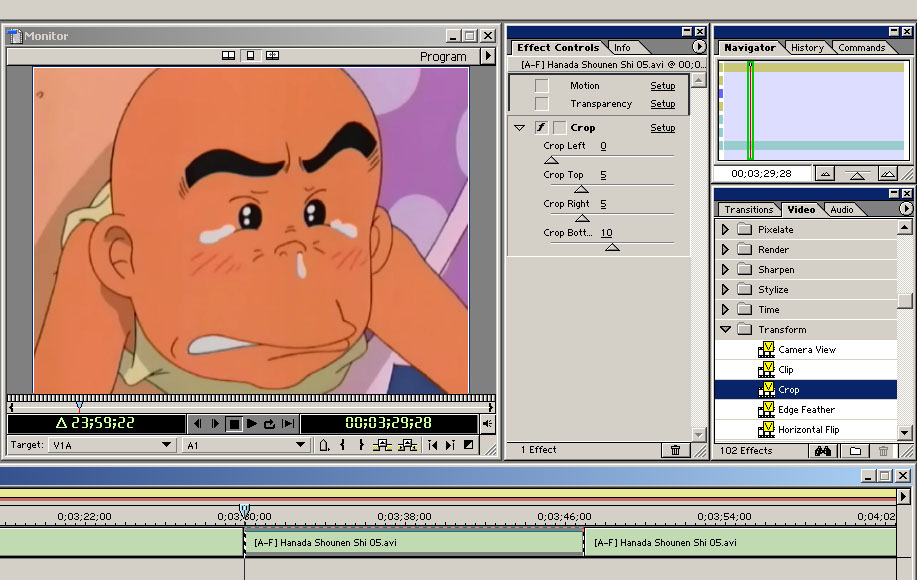
First, select the video clip on your timeline that has subtitles. Next, we will apply a video effect to crop the image. You may need to go to Window > Show Video Effects in order to make the effects list appear. Now there are a few different filters that you can use here to achieve the same effect, but for the purposes of this guide, we will use the effect called Crop which is located under the Transform heading. Simply drag the effect onto the clip. Now adjust the value of Crop Bottom until the subtitle is off the screen. Now this has stretched the video, so in order to keep the correct aspect ratio, we need to crop the same amount off of the sides. For example, if you cropped 10 off of the bottom, you should also crop 5 off of the left and 5 off of the right.
3. Overlays - The great cover-up.
This method, as explained here, will only work in Adobe Premiere. I'm sure there are ways of doing it in other editing programs, but you are left to discover them on your own.
This method works great, but the times you will be able to use it are quite limited. There can be NO motion around the subtitles, and they must "appear" or "dissapear" without the scene changing.
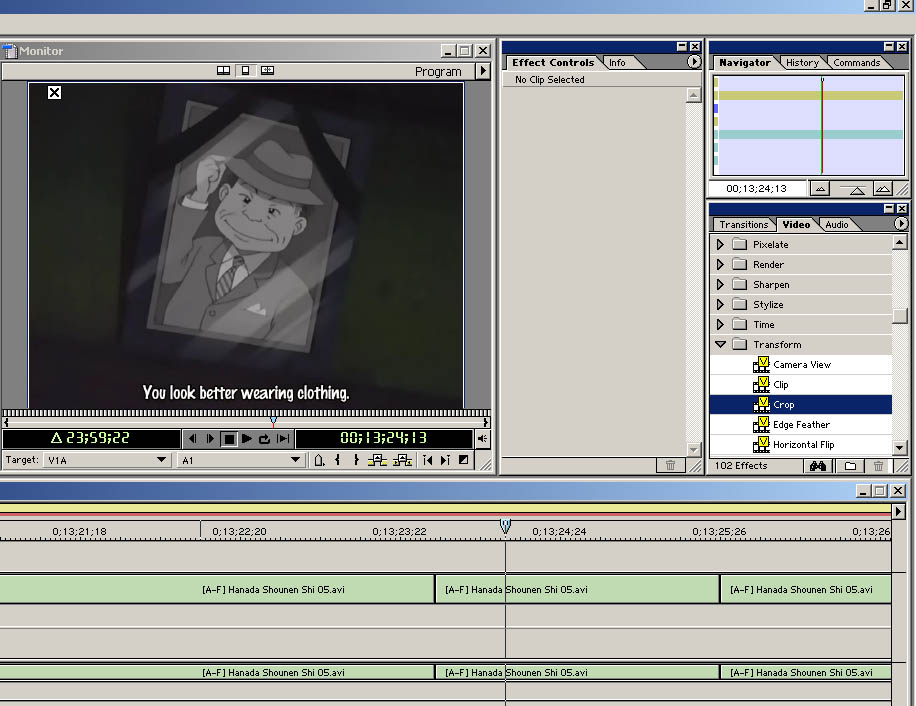
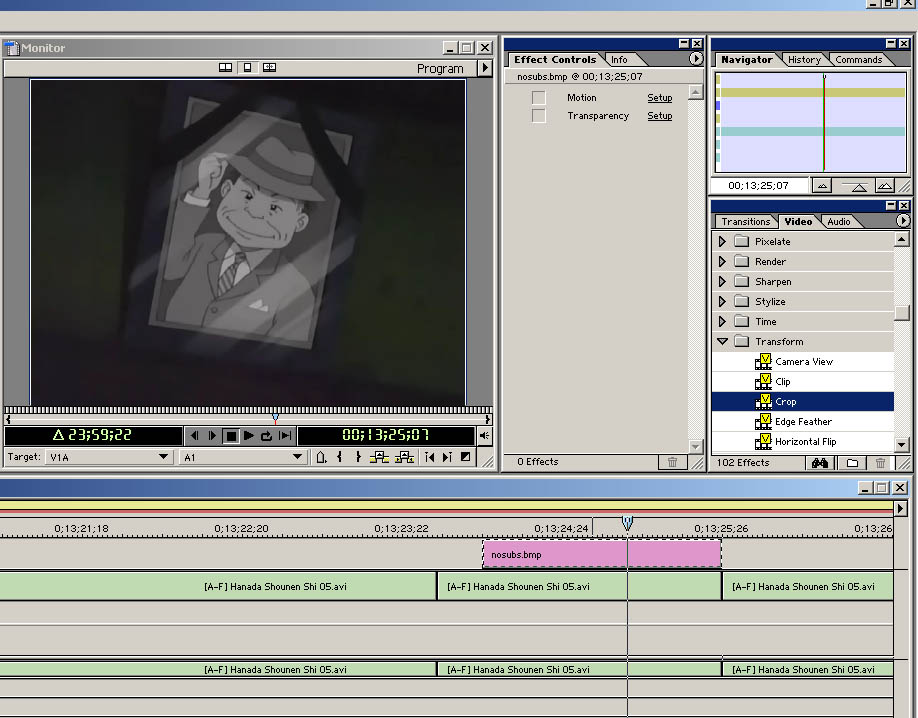
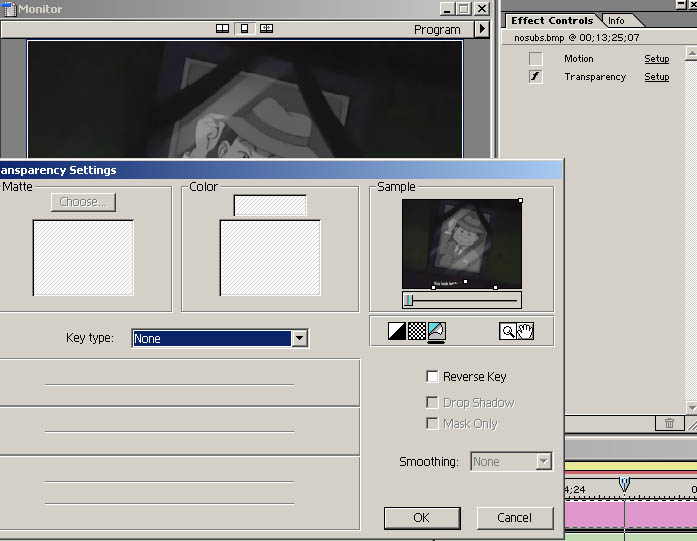
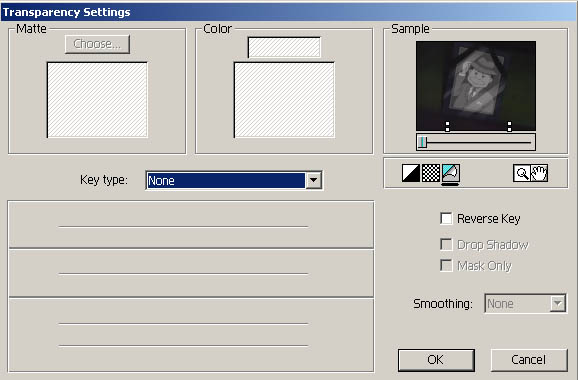
This scene starts off with a clean, unsubbed image, then when the character begins talking, the subtitles appear onscreen. Go to the frame right before the subtitles appear, and export the frame as an image. In Adobe Premiere, you can just do File > Export Timeline > Frame. Now import this image back into Premiere, and place it above the clip with the subtitles, and stretch its length to cover the entire time the subs appear. Now click the transparency button. In the small window that shows the video here, you should see a small dot in each corner of the window. Drag these 4 dots so that they just cover up the subtitle. See the images below for a better idea. Finally, hit the OK button in the transparency settings, and you're done!
4. Image editing - Not for the faint of heart.
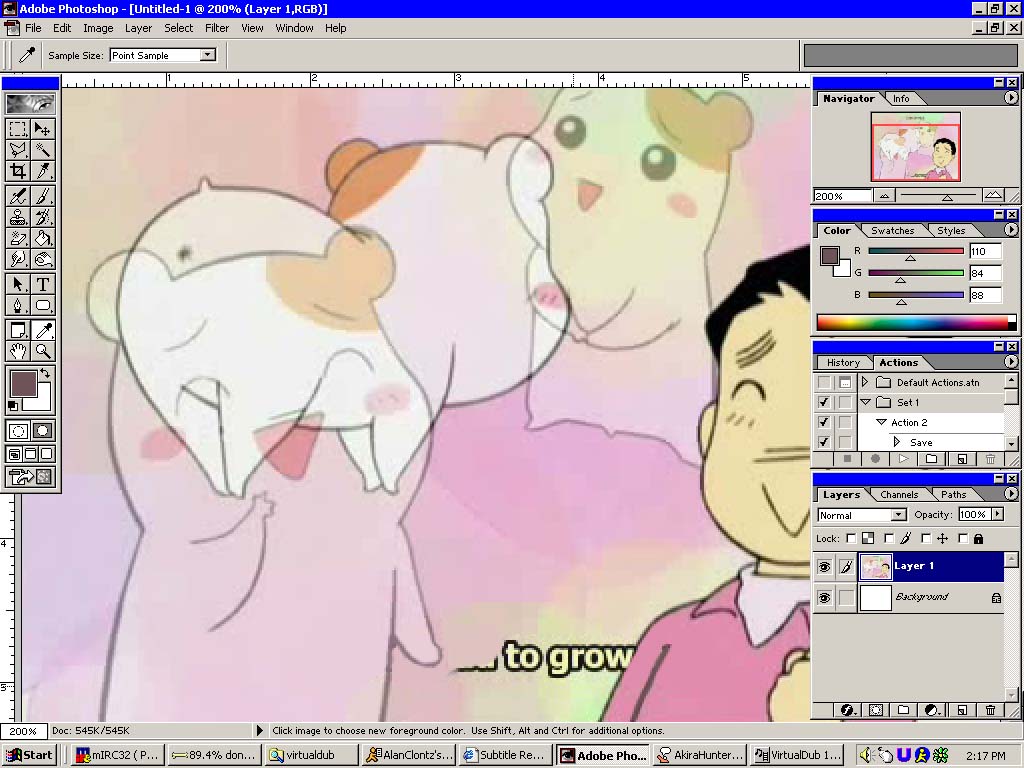
Ok, so you've tried everything else, and nothing will work without making your video look bad. Just about your only option left is to draw back in what the subtitles are covering up. For this step, you need to be familiar with an image editing program, such as Adobe Photoshop.
First, export just the single clip thats bothering you from your editing program as a lossless or huffyuv AVI file. Then load up the clip in VirtualDub. Remember, there are about 24 frames in a single second of video. If you wanna cut your work in half, but at the expense of smoothness, go to Video > Frame Rate, and choose Process every other frame. Now, go to File > Save Image Sequence. This will save each video frame as a single image.
Now, load the images one at a time into your image editing program, and have at it. You basically just wanna paint over the subtitles as best you can. After you are done editing, insert each frame back into your video editing software.

5. Logo Removal - For those tv captures.
For those times when you are working with video that's been captured off of television, there will be a network logo on the footage that you may wish to remove. Here are a variety of filters for virtualdub and avisynth that will remove the logo for you. For help on using avisynth, check the Guide To All Things Video. These filters all include documentation on how to use them, so that won't be covered here. Instead, I will simply list a few filters that you might find usefull.
X-Logo is a VirtualDub and Avisynth filter that is somewhat difficult to set up, but gives good results.
LogoAway This VirtualDub filter is different from the other two in that it doesn't really try to actually remove the filter, but rather blurs it away. I really dont recommend this filter unless you just can't get any results with the other two. This filter IS good for removing subtitles from a single scene sometimes though. To try it just use it exactly like the documentation says, only cover up the subtitle instead of a logo.