AnimeMusicVideos.org > Guide Index
Aspect Ratios and Frame Sizes for Online DistributionSo, you have a progressive video - the next thing to do is make sure that it's all cropped and resized properly. If you are encoding for a convention, then it's still a good idea to read through this to make sure you haven't done anything weird to your aspect ratio, but instructions for resizing for a convention can be found in the Encoding for a convention page. If you have been following this guide, then you have probably already correctly resized your video footage before you edited it. In that case you might want to skip ahead to the Improving Visual Quality and Compressibility page. There has been a lot of complicated discussion of frame sizes and
aspect ratios so far in this guide. With any luck you have worked out
things like anamorphic footage, square pixels vs dvd pixels and so on. 1) You need to crop off any excess borders or junk areas. These areas will only make compression more difficult if you try and encode with them - this includes both letterboxing and video signal noise at the top and bottom of the image.
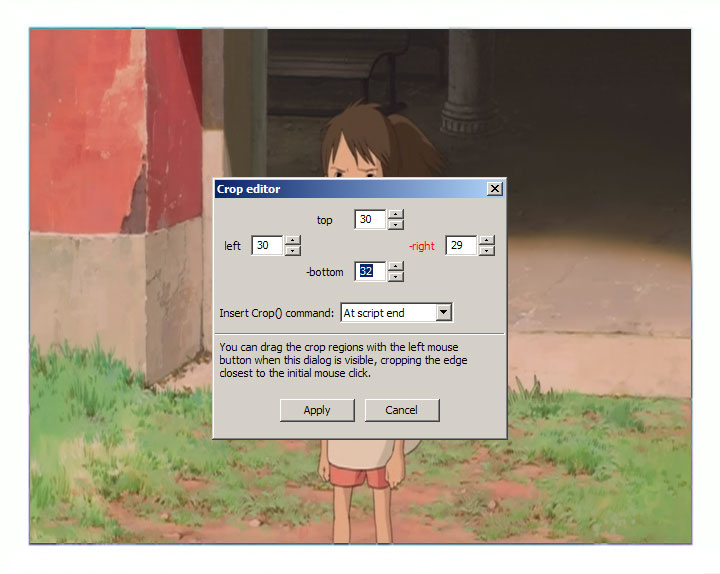
Here I am working with a PAL version of Spirited Away, which for whatever reason, happens to have some pretty large areas along the sides which need to be cropped off. Most DVDs will only need to be cropped a little. With the crop editor up, you can simply click your mouse on the edge of the video frame where you want to crop to, and the values will automatically be filled in. One thing you want to keep in mind, is that you should only crop each side to an even value. In the image above you can see that it highlighted the right side cropping value in red, because it contains an odd value. Make sure to correct all of these before you hit Apply. To load the resize calculator, simply go to Tools > Resize Calculator...
The first thing you see here is the Video resolution. This should automatically be filled in, so you shouldn't need to touch it. Next, is the Pixel aspect ratio of your input video. If your input is a d2v file, then should automatically be set correctly. Otherwise, click the ... button and a selection screen will come up where you can choose from various PARs. If you are working with NTSC video, you want to choose either the NTSC 4:3 option or the NTSC 16:9 option. Likewise for PAL, you would choose the PAL 4:3 or PAL 16:9 option. If your footage already has the correct aspect ratio, then simply choose 1:1. The next thing to do is press the Configure button to open a window with some more settings. Most of these should be fine at their defaults, but you will notice another setting for Target Aspect Ratio. You most likely want to set this to 1:1 for viewing on a PC. Finally we go back to the main screen of the resize calculator to adjust the frame size itself - how big should you resize to? Well there are all sorts of possibilities but a general rule of thumb is as follows: The larger the frame size, the bigger the final encode will need to be to be good quality and the slower it will play on some machines. Of course, very small frame sizes will always be low quality so you need to decide a good balance for you. As a general rule, I would keep the vertical resolution of the output equal to (or close to) the vertical resolution of the input. You should not resize any larger than this. However you can resize smaller than this, if you would like to reduce the final filesize of your video, or to make it easier to play back on older computers.
So, you should move the frame size slider until you get your desired
size. Looking for frame sizes near to your desired width with a small
error margin is a useful thing to do.
|