by Dennis 'Kirin' Ramos
kirin at saphiria dot net
Introductions | Splitting Clips
Import Clips and Using iMovie
Exporting from iMovie
Helpful Tips and Suggestions
Introduction
If you're one of those people living in the 10 percent of the computer world, like myself, then you'd probably know that the software we use works a little differently compared to people living in the Windows-based world. But differences aside, there are ways of getting things done on a Mac ... sometimes, it just requires a different way of thinking.
In this particular tutorial, I'm going to demonstrate how I used iMovie to make an Anime Music Video. If you know how to use Final Cut Pro or Final Cut Express, good for you! This is for the rest of us that can't afford that stuff. Also, if you're a recent 'switcher' (congrats on switching over by the way), when I refer to the COMMAND key, it's the key that has the Apple logo on it.
Before I start off, I'll tell the things I've used so that you can download these while you read this tutorial.
For reference, you might want to know what kind of machine I'm running so you have a pretty good idea how long you would have to wait for certain operations to complete. I have a 800 MHz G4 iBook with 640 MB DDR RAM. My hard drive runs at 4200 rpm. Same with my 3rd generation iPod which I used as an external FireWire 400 hard drive. Both hard drives have a 2 MB cache. It would help if your hard drive is faster than that, like 7200 rpm or higher, and has a larger cache, like 8 or 16 MB. If you're on a PowerBook with a FW800 port, try to get a FW800 drive instead of a FW400 drive. If you have a G5, make sure you get SATA drives instead of EIDE/PATA drives or FW800 if you prefer to transport that drive to other computers outside your network.
Things to know about iMovie
First of all, anything you import into iMovie gets converted to DV (or DVCAM, DVCPRO, or Digital8 ... whatever name you prefer) automatically. There is no way around it and you'll have to live with the DV format until you export your video. If you prefer not to work with DV (or want to use DVCPRO50), you'll probably want to pick up a copy of Final Cut and learn how to use that instead. If you want to get really dirty on the DV format, you can read about it in this verbose article by Adam J. Wilt in regards to the DV format. Additionally, if you're using various sources of footage, it is a good idea to make sure that all the footage has the same pixel ratio (16:9, 4:3, etc.). That way, nothing looks distorted, pixel-wise, when exporting.
Acquiring Sources + Splitting Files
Using Fansubs (using DVD rips? Click here)
WARNING: First and foremost, AnimeMusicVideos.org does NOT recommend the use of downloaded material. If you want good-quality footage, you should buy the DVDs. You could wait until the anime you want to use is licensed and a Region1 DVD is released or buy the Region2 DVD straight from Japan from places like YesAsia or Amazon Japan. If you're using Region0 DVD's with Chinese subs ... well ... well? ... *shrug*
NOTE: Also, let me remind you that when using fansubs, you'll have to find ways to get around the subtitles as those can kill a would-be-good video. There are many methods to get around this. The most cheesiest method is the LetterBox but if you don't want to use a LetterBox, you would need to use the Crop features when you convert it to DivX or XviD, or manually edit each and every frame using photo editing tools... or at least use a more creative LetterBox besides full-black. Another method is rip from the DVD version but that obviously requires that you to have the DVD. Additionally, if you are splitting DivX 5.x footage, you may run into a few problems/glitches when heavy movement is involved.
Can we start now? I know using downloaded footage is 'not good' but I'll 'experiment' anyway ... Sure thing! I not stopping you. You probably spent overnight downloading a 4.7 GB torrent way before you started reading this so might as well.
One thing you must know, if you plan on using fansubs for your music video, you need the appropriate QuickTime components because like most of Apple media programs, they all rely on QuickTime to make them work. Most fansubs are either DivX or Xvid. Make sure you download the "FFusion 2.2" component (was previously called "ffmpeg DivX 2.1"). Alternatively, you can also use the 3ivx component instead of FFusion. That will allow you to import 3ivx, DivX, or Xvid clips into your iMovie project.
How about formats like OGM, Matroska, Windows Media, and Real Media? WindowsMedia 7 and 8 and all versions of RealVideo can be converted over to DivX using ffmpegX. If you find the author's software very useful, you should pay his shareware fee. In my opinion, it's the best 15 bucks you'll ever spend. WindowsMedia 9 and newer, however, will need to be converted to something more QuickTime-friendly using a PC. However, you can use Snapz Pro to stream the capture from Windows Media Player and export it as DV but the software is not cheap ($69.99) and the demo version will put a not-so-subliminal watermark on your image. |
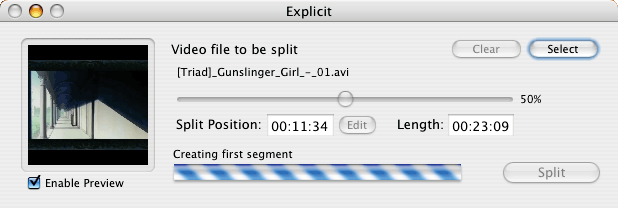
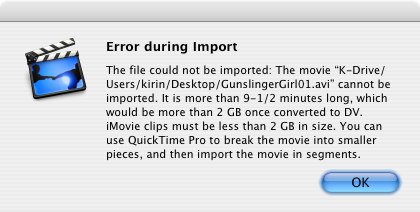
Also you must take account that you have to split the video file in separate pieces. This is because iMovie can't import anything larger than 9:57 minutes of NTSC video (or 9:27 for PAL). If you try to import something large, you'll get this error message. There are tools out there which allows you to split these files. That iMovie error message recommends using QuickTime Pro, but that costs 30 bucks. If you're cheap, like me, I would use a freeware app called Explicit for DivX, or XviD files. Also, if you're really hip in Unix command line programs, you can also MEncoder to split the file as well.
However, since working in the Terminal frightens some people, despite the innocent look of it, let's use Explicit instead. We'll talk Terminal stuff later in this tutorial.
That window above is the Explicit program. It's really simple to use. Just simply drag-n-drop the .avi file from the Finder into the Explicit window, move the slider until you find a desirable position to split at and then click on the Split button! When you're done, you should have two new files ending with Part 1 and Part 2.

Although ... I personally like to rename them since "[Triad]_Gunslinger_Girl_-_05 - Part 7.avi" is just a little too long to remember. It could have been worse if it had something like [AB12CF08] or some strange hex thing on the filename (There's actually a reason why it's there but we'll explain that another time). I usually give them something short like "GSG05-07.avi" (GunSlinger Girl Episode 05, part 07). When ever I need a certain part, I think "5-oh-7, okay!"
I'm sure there's a much faster way to get this done, right? I got QuickTime Pro. Can I use that?
|
Now that you have butchered up your anime, you're ready to import some of them into iMovie. Click here to continue.
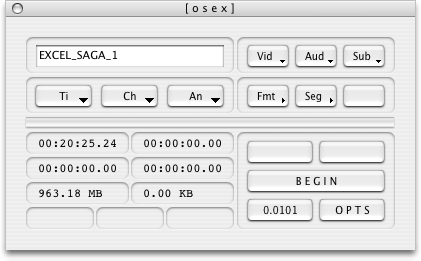
The first step is to rip the DVD since the data on DVDs are encrypted using Macrovision's technology, CSS. In this one we'll use a program called OSex. It looks like this:
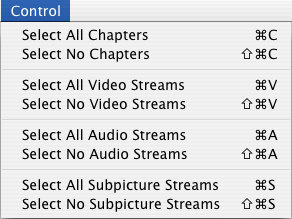 |
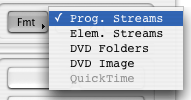
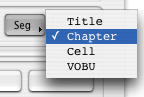
On the menu bar where it says File and Control, unless you plan on using the Audio for your AMV, I would "Select No Audio Streams" and also "Select No Subpicture Streams" so you wouldn't get those annoying subtitles. After that I would also change the Seg (segments) to Chapter and the Fmt (format) to Progressive Streams.
|
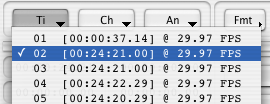
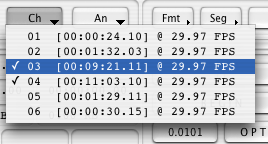
Additionally, if you plan on working off certain chapters instead of the whole DVD, you can also select which chapters you want to rip by clicking on the Ch button, otherwise, you can pretty much hit the BEGIN button. Before we start, you see a filesize of 963.18 MB in the picture above? That's how much content will be ripped so make sure you have enough disk space before you click that BEGIN button. The time to finish will depend on the speed of your DVD drive. For me, it took a couple minutes to finish. NOTE: Some DVDs, such as titles licensed by ADV Films, have the episodes seperated by different Titles instead of Chapters so make sure that if you want to rip a certain episode, you choose the correct Title otherwise you might end up ripping a small portion of just one episode, which in this case, you may want to change the Seg to Title instead of Chapter if you prefer to keep your VOB rips to one VOB per episode. |
|
|
TIP: With addition to that note above, if the Opening and Ending theme are in their own Chapters, you can probably save yourself some time and choose not to rip them. Some DVDs even have credit-less versions of the Opening and Ending themes so you should use those when necessary. Those credit-less versions should be in their own Titles. When you are done, you should have a have a bunch of .vob files in your target folder as seen in the example below (one .vob per Chapter or Title, depending on how you Segmented them). Please note that the filesizes are normal. Ever wonder why Dual-Layer DVDs can store almost nine gigabytes worth of data? Now you know. |

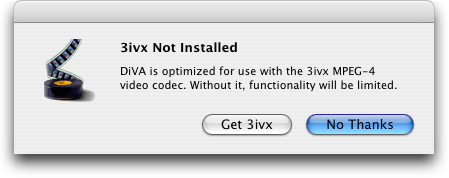
After that, you need to convert the file into a QuickTime file. By default, DiVA uses 3ivx. I strongly NOT recommend using 3ivx during production. It'll even bug you about it if you don't have it installed. Apple provides many different codecs for you to use. I personally use Apple Pixlet or Photo JPEG (if I'm tight on space).
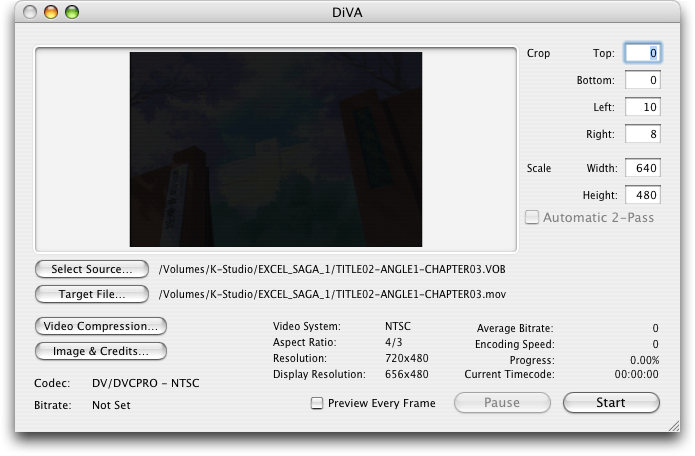
First, click on Select Source... and choose the vob file you wish to convert. Next, click on Target File... to save the destination of the exported QuickTime movie. Before we hit the Start button, we should change the codec and optionally crop out any borders of letterboxes that we might not use. In order to change the codec, click on the Video Compression... icon.
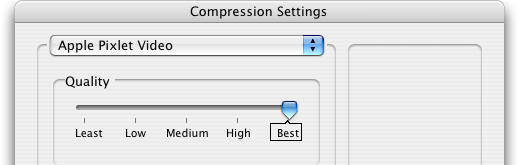
Choose Apple Pixlet. Also, set the Quality slider to Best.
TIP: If your content has a letterbox or any black borders and you wish not to use the it, you can click on the Image & Credits... button to crop off the Letterbox. You should also change the the scale for 16:9 content.
Wait ... Apple Pixlet or Photo JPEG? What's the point if iMovie is going to convert it to DV anyway? If you don't have QuickTime Pro, you need to use a codec that doesn't rely on the High Quality flag to determine the quality of the video. Apple Pixlet or Motion JPEG B is recommended but if you're tight on disk space, you can also use Photo JPEG at a Best Quality setting. Other codecs you can try are Animation, BMP, TIFF, TGA, Component, PNG, or Planar RGB but their bitrates are enormous at roughly 17~25 MBytes/sec ... or you can wait until someone ports the HuffYUV codec, a popular lossless codec on Windows, to Mac as a QuickTime component. |
Now let it do its magic in converting a vob file into a iMovie-friendly format. We can do that by clicking on the Start button.
It takes about 40 minutes on my computer to convert a 10 minute clip into QuickTime using Apple Pixlet codec.

After that, we need to butcher them up. If the vob clips are greater than 9:57 (or 9:27 in PAL) then it is a requirement. If you have QuickTime Pro and Mac OS X 10.3.x, then AppleScript's your buddy. But if you don't have the money for QuickTime Pro, there's Clip Creator 2. It looks like this (AnimeGirl Gone Wild not included):
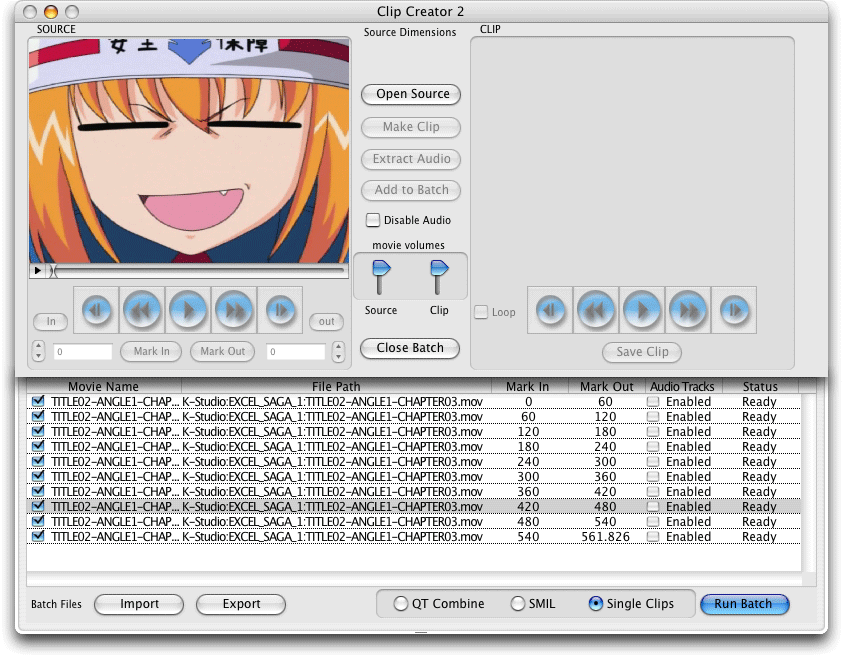
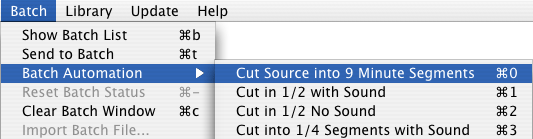
To get started, Click on Open Source and choose the .mov file that you just created using DiVA. We want to split them into something that iMovie can handle so we go to Batch --> Batch Automation --> Cut Source into 9 Minute Segments:
|
TIP: If you prefer to use short clips, like I do, go to Preferences and change the segment length to something less than nine minutes. |
After the batch completes, you should have seperate clips for each MOV file. It took around 36 minutes to butcher up a 21 minute episode in 1-minute segments. It may take a little shorter if you choose larger segments.
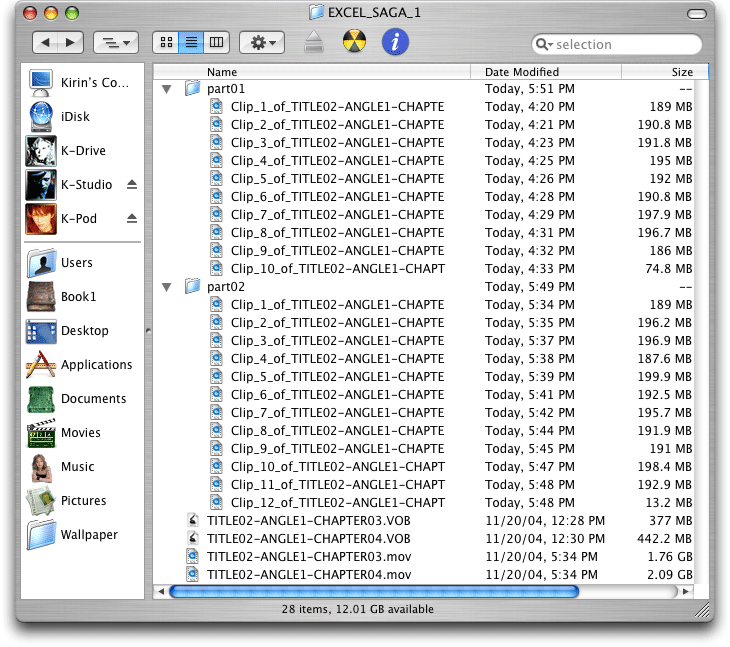
TIP: Because the output filenames are limited to 31 characters, it would be best to make folders of each set of clips that you butchered up.
From there, you can simply import those clips into iMovie. It does take a considerable amount of time to import Pixlet footage into iMovie so please be patient.
And anime in VHS format? |
Now that you have butchered up your anime, you're ready to import some of them into iMovie. Click here to continue.